Artwork for Folded Flyers
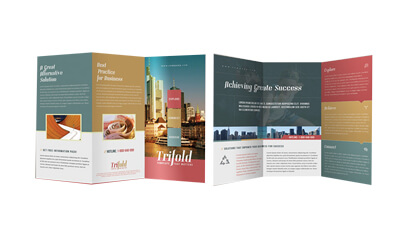
Setting up the artwork for folded flyers is tricky, so here is an overview on how to get the page sizes correct.
This is for and A4, which is going to be folded to DL.
There are two ways to do this, a Z-fold, and a Roll fold, or a fold in..
Z- Fold
A Z-Fold is the easier of the two, as each panel is the same size.
- Start with your A4 sized artboard with bleed = 303mm x 216mm. This is to allow for the external bleed around the outside of the document. (You can do this automatically in the Adobe products.)
- Place a line down the page 102mm away from the left and right edges.
- Duplicate this, page, so you now have a front and a back page, with 3 panels on each page.
- Now place your designs into each panel, with any colours that you want to go all the way to the outside edge of the document.
- Ensure that all important content, logo’s, and any graphics that you don’t want to get cut off 6mm away from any edge of the document. This will the automatically ensure that you get the internal bleed correct.
- Keep content within the panels, and not to close to the folds, as you should not have content going across the folds if you can help it.
- The front left panel will be the front of the flyer once it has been folded. The front fight panel will be the inside back panel when folded.
- The back left panel will be the back panel of the brochure when it is folded. Once you have done your design, print it out on your local printer, and check to see that the folds work, and that you have the panels in the correct position.
Roll fold or ‘fold in’.
These are more popular, but a bit more difficult to explain, but hang in there..
- Start with your A4 sized artboard = 303mm x 216mm. This is to allow for the external bleed around the outside of the document. (You can do this automatically in the Adobe products.)
- Place a line down the page 103mm away from the left edge
- Place a second line down the page 101mm away from the right hand edge.
- Duplicate this, page, so you now have a front and a back page, with 3 panels on each page.
- Now place your designs into each panel, with any colours that you want to go all the way to the outside edge of the document.
- Ensure that all important content, logo’s, and any graphics that you don’t want to get cut off 6mm away from the edge of the document. This will the automatically ensure that you get the internal bleed correct.
- Keep content within the panels, and not to close to the folds, as you should not have content going across the folds if you can help it.
- The Front right panel is the front page of the flyer.
- The Front middle panel is the back of the flyer.
- The Front left panel is folded into the middle of the flyer, so it is ‘fold in.’
- The Back right panel is folded in.
If you are able to follow these instructions, this should get you on your way to getting your folded flyer correctly laid out.
The Artwork
Artwork must be CMYK, or you may get discrepancies in the colours, so please avoid spot and RGB colours.
Outline text if you can.
Remember to discuss how to set up your artwork before you start with your project.
We can get your folded flyers made really fast for you in an emergency, give us a call on 0421 840 465, or send us a quote request from our contact page HERE
To read more about folded flyers, go here..


